Tutorial: Tic-Tac-Toe
Before We Start the Tutorial
We will build a small game during this tutorial. The techniques you’ll learn in the tutorial are fundamental to building any React app, and fully understanding it will give you a deep understanding of React.
The tutorial is divided into several sections:
- Setup for the Tutorial will give you a starting point to follow the tutorial.
- Overview will teach you the fundamentals of React: components, props, and state.
- Completing the Game will teach you the most common techniques in React development.
- Adding Time Travel will give you a deeper insight into the unique strengths of React.
What Are We Building?
In this tutorial, we’ll show how to build an interactive tic-tac-toe game with React.
You can see what we’ll be building here. If the code doesn’t make sense to you, or if you are unfamiliar with the code’s syntax, don’t worry! The goal of this tutorial is to help you understand React and its syntax.
We recommend that you check out the tic-tac-toe game before continuing with the tutorial. One of the features that you’ll notice is that there is a numbered list to the right of the game’s board. This list gives you a history of all of the moves that have occurred in the game, and it is updated as the game progresses.
Once you’ve played around with the finished tic-tac-toe game, keep scrolling. We’ll be starting from a simpler template in this tutorial. Our next step is to set you up so that you can start building the game.
Setup for the Tutorial
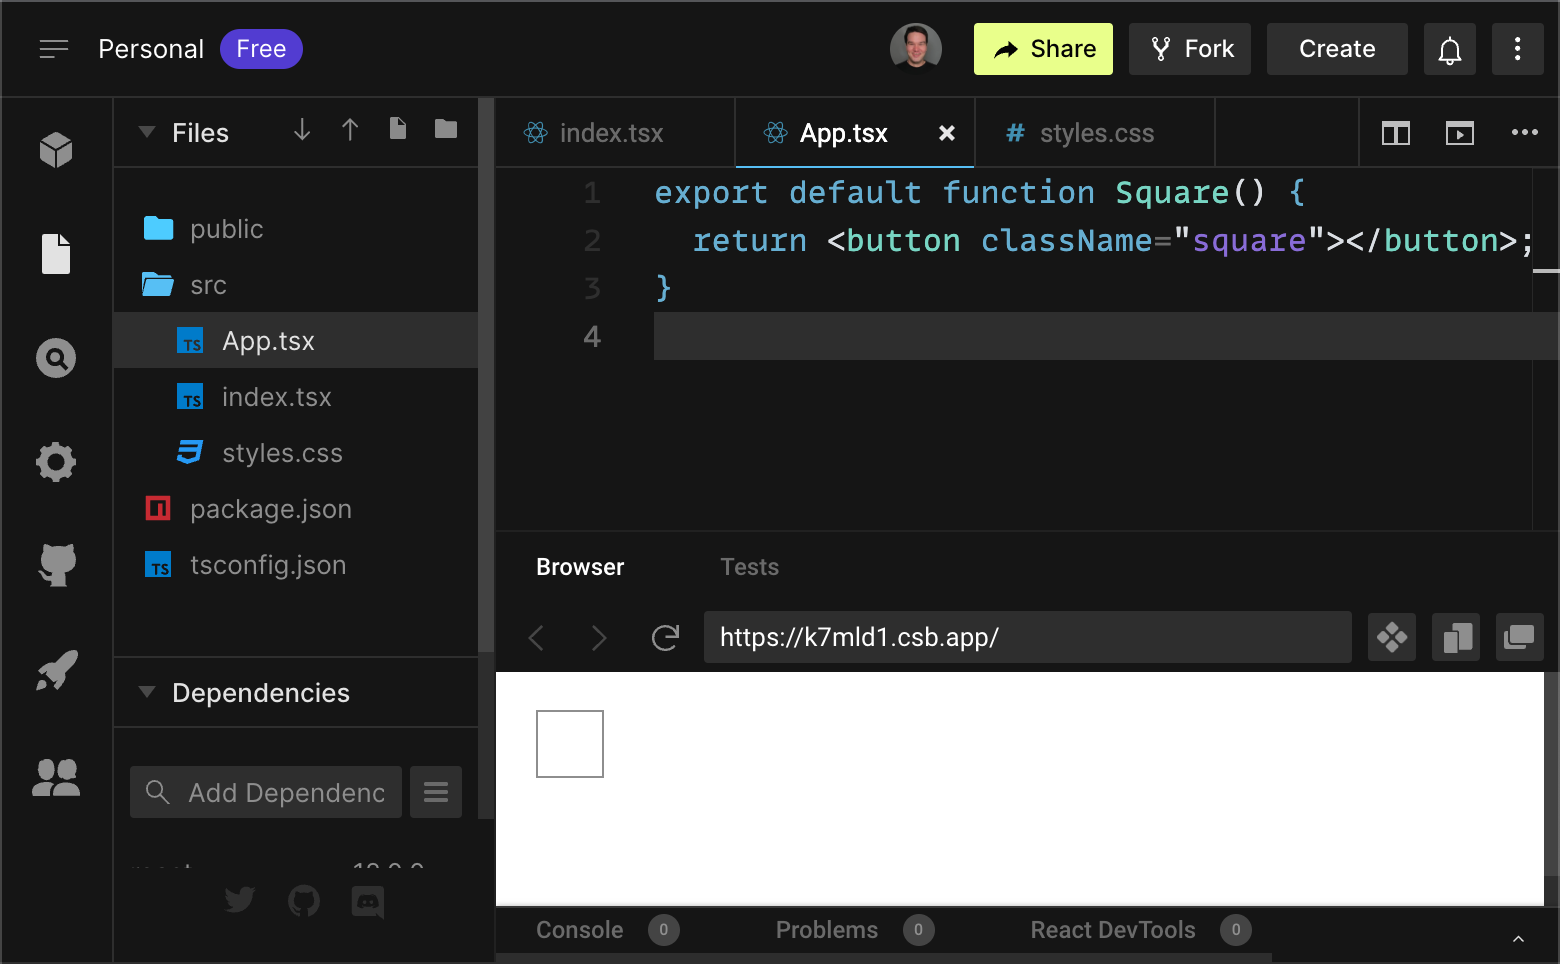
In the live code editor below, click Fork in the top-right corner to open the editor in a new tab using the website CodeSandbox. CodeSandbox allows you to write code in your browser and immediately view how your users will see the website you’ve created. The new tab should display an empty square and the starter code for this tutorial.
export default function Square() {
  return <button className="square">X</button>;
}
Help, I’m Stuck!
If you get stuck, check out the community support resources. In particular, Reactiflux Chat is a great way to get help quickly.
Overview
Now that you’re set up, let’s get an overview of React!
Inspecting the Starter Code
In CodeSandbox you’ll see three main sections:
- The Files section with a list of files like
App.js,index.js,styles.cssand a few folders likesrc - The code editor where you’ll see the source code of your selected file
- The browser section where you’ll see how the code you’ve written will be displayed
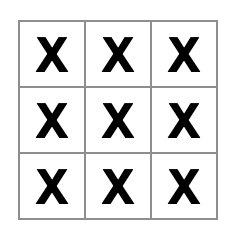
The file App.js should be selected in the files section and you the contents file in the code editor should look like this:
export default function Square() {
  return <button className="square"></button>;
}
The browser section should be displaying a square with a X in it like this:

React Components
The code in App.js create a component. In React, a component is a piece of reusable code that represents a part of a user interface. Components are used to render, manage, and update the UI elements in your application. Lets take the component line by line to see what’s going on:
export default function Square() {
  return <button className="square">X</button>;
}
The first line defines a function called Square. export means that this function is acessible outside of this file. default tells other files using our code to start with this function.
export default function Square() {
  return <button className="square">X</button>;
}
The second line returns a button. The return keywords means whatever comes after is returned as a value to whomemver is calling the function. <button> is a JSX element. A JSX element is a cobination of JavaScript code and HTML tags describes what we’d like to display. className="square" is a button property or prop that tells CSS how the look of the button should be styled. X is the text displayed inside of the button and </button> closes the JSX element to indicate that any following content shouldn’t be place inside the button.
styles.css
Click on the file labeled index.js in the Files section of CodeSandbox. This file defines the styles for our React app. The first two CSS selectors (* and body) define the style of large parts of our app while the .square selector defines the style of any componenet where the className property is set to square as we did in the our Square component.
index.js
Click on the file labeled index.js in the Files section of CodeSandbox. We won’t be editing this file during the tutorial but it is the bridge between the component we created in the App.js file and the web browser.
import {StrictMode} from 'react';
import {createRoot} from 'react-dom/client';
import './styles.css';

import App from './App';
Lines 1-5 brings all the necessary peices together: React, React’s library to talk to web browsers (React DOM), the styles for our components, and finally the componenet we created in App.js.
The remainder of the file brings all the peices together and injects the final product into index.html in the public folder.
Building the board
Currently our board is only a single square, but we need nine! If we just try and copy paste our square to make more squares like this:
export default function Square() {
  return <button className="square">X</button><button className="square">X</button>;
}
we’ll get this error:
/src/App.js: Adjacent JSX elements must be wrapped in an enclosing tag. Did you want a JSX fragment <>...</>?React component need to return a single JSX element and not multiple adjacent JSX elements like two buttons. To fix this we can use divs (<div> and <div/>) to wrap multiple adjacent JSX elements like this:
export default function Square() {
  return (
    <div>
      <button className="square">X</button>
      <button className="square">X</button>
    <div/>
  );
}
Now you should see:

Great! Now we just need to copy-paste a few times to add nine squares and…

Oh, they are all in a line, not in a grid like we need for our board. To fix this well need to group our squares into rows with divs and add some CSS. While we’re at it, we’ll give each square a number to make sure its in the right place:
export default function Square() {
  return (
    <div>
      <div className="board-row">
        <button className="square">1</button>
        <button className="square">2</button>
        <button className="square">3</button>
      </div>
      <div className="board-row">
        <button className="square">4</button>
        <button className="square">5</button>
        <button className="square">6</button>
      </div>
      <div className="board-row">
        <button className="square">7</button>
        <button className="square">8</button>
        <button className="square">9</button>
      </div>
    </div>
  );
}
// ...
.board-row:after {
clear: both;
content: '';
display: table;
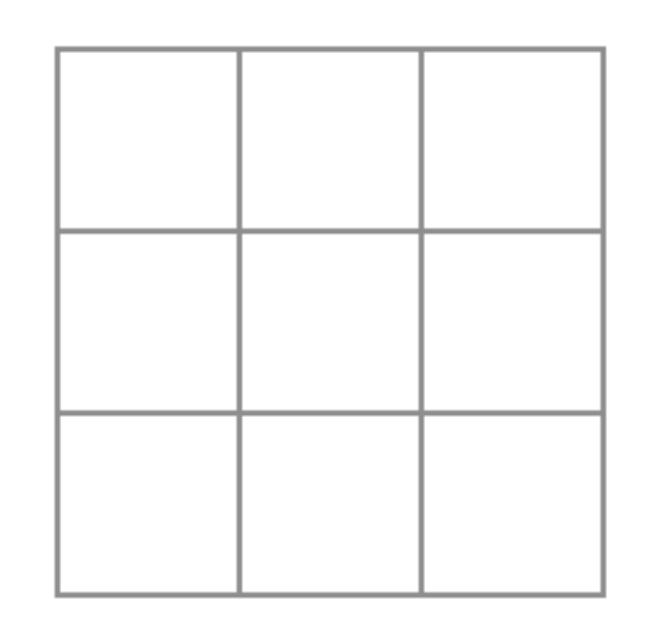
}Now that we’ve grouped our componenets into rows with divs with the class name board-row and added some CSS to style the rows into a grid we have our tic-tac-toe board:
but we now have a problem. Our componenet named Square, really isn’t a square anymore. Let’s fix that by changing the name to Board.
At this point your code should look something like this:
export default function Board() {
  return (
    <div>
      <div className="board-row">
        <button className="square">1</button>
        <button className="square">2</button>
        <button className="square">3</button>
      </div>
      <div className="board-row">
        <button className="square">4</button>
        <button className="square">5</button>
        <button className="square">6</button>
      </div>
      <div className="board-row">
        <button className="square">7</button>
        <button className="square">8</button>
        <button className="square">9</button>
      </div>
    </div>
  );
}
Passing Data Through Props
Next, we want to change the value of a square from empty to “X” when the user clicks on the square. With how we’ve built the board so far we would need to copy-paste the code that updates the square nine times (once for each square we have)! Instead of copy-pasting, React’s component architecture allows us to create a reusable component to avoid messy, duplicated code.
First, we are going to copy the line defining our first square (<button className="square">1</button>) from our Board component in a new Square component:
function Square() {
  return <button className="square">1</button>;
}

export default function Board() {
  // ...
}
then we’ll update the Board component to use the Square component using JSX syntax:
//...
export default function Board() {
  return (
    <div>
      <div className="board-row">
        <Square />
        <Square />
        <Square />
      </div>
      <div className="board-row">
        <Square />
        <Square />
        <Square />
      </div>
      <div className="board-row">
        <Square />
        <Square />
        <Square />
      </div>
    </div>
  );
}
let’s take a look:

Oh no! We lost the numbered squares we had before. Now each square says “1”. To fix this, we will use props to pass the value each square should have from the parent component (Board) to the child componenet (Square).
Update the Square component to take the value prop as a argument and use the value to display the correct number:
// ...

function Square({value}) {
  return <button className="square">{value}</button>;
}

// ...
function Square({ value }) indicates the Square component can be passed a prop called value. the {value} in <button className="square">{value}</button> is a special syntax that tells React where to place the value of the value varible in the JSX element.
For now, you should see a empty board:
this is because the Board component hasn’t passed the value prop to each Square component it creates yet. To fix it we’ll add the value prop to each Square component created by the Board component:
export default function Board() {
  return (
    <div>
      <div className="board-row">
        <Square value="1" />
        <Square value="2" />
        <Square value="3" />
      </div>
      <div className="board-row">
        <Square value="4" />
        <Square value="5" />
        <Square value="6" />
      </div>
      <div className="board-row">
        <Square value="7" />
        <Square value="8" />
        <Square value="9" />
      </div>
    </div>
  );
}
Now we should see our grid of numbers again:

Your updated code should look like this:
function Square({value}) {
  return <button className="square">{value}</button>;
}

export default function Board() {
  return (
    <div>
      <div className="board-row">
        <Square value="1" />
        <Square value="2" />
        <Square value="3" />
      </div>
      <div className="board-row">
        <Square value="4" />
        <Square value="5" />
        <Square value="6" />
      </div>
      <div className="board-row">
        <Square value="7" />
        <Square value="8" />
        <Square value="9" />
      </div>
    </div>
  );
}
Making an Interactive Component
Let’s fill the Square component with an X when we click it. First, change the button JSX element that is returned from the Square component to add onClick to its props:
function Square({value}) {
  return (
    <button
      className="square"
      onClick={() => {
        console.log('click');
      }}>
      {value}
    </button>
  );
}
the () => syntax is called an arrow function which allows us to use function without defining it before hand. React will call this function when the JSX element is clicked. If you click on a square now, you should see click in the Console tab at the bottom of the Browser section in CodeSandbox. Clicking the board more than once will increment a counter next to the text click, indicating how many times you’ve clicked a square.
As a next step, we want the Square component to “remember” that it got clicked, and fill it with an “X” mark. To “remember” things, components use state.
React provides a special function called useState that you can call from your component to let it “remember” things. Let’s store the current value of the Square in state, and change it when the Square is clicked.
Import useState at the top of the file. Replace the value prop from the Square component with a call to useState that defines a state variable called value:
import { useState } from "react";

function Square() {
  const [value, setValue] = useState(null);
  return (
    // ...
  )
}
//...
value stores the value and setValue is a function that can be used to change the value. The null passed to useState is used as the initial value for this state variable, so value here starts off equal to null.
Since the Square component no longer accepts props anymore, we’ll remove the value prop from all nine of the Square components created by the Board componenet:
// ...
export default function Board() {
  return (
    <div>
      <div className="board-row">
        <Square />
        <Square />
        <Square />
      </div>
      <div className="board-row">
        <Square />
        <Square />
        <Square />
      </div>
      <div className="board-row">
        <Square />
        <Square />
        <Square />
      </div>
    </div>
  );
}
Now we’ll change Square to display an “X” when clicked. Replace the console.log("click"); event handler with setValue('X');. Now our Square component looks like this:
function Square() {
  const [value, setValue] = useState(null);
  return (
    <button
      className="square"
      onClick={() => {
        setValue('X');
      }}>
      {value}
    </button>
  );
}
By calling this set function from an onClick handler, we tell React to re-render that Square whenever its <button> is clicked. After the update, the Square’s value will be 'X', so we’ll see the “X” on the game board.
If you click on any Square, an “X” should show up:

Note that each Square has its own state: the value stored in each Square is completely independent of the others. When you call a set function in a component, React automatically updates the child components inside of it too.
After your made the above changes, your code will look like this:
import {useState} from 'react';

function Square() {
  const [value, setValue] = useState(null);
  return (
    <button
      className="square"
      onClick={() => {
        setValue('X');
      }}>
      {value}
    </button>
  );
}

export default function Board() {
  return (
    <div>
      <div className="board-row">
        <Square />
        <Square />
        <Square />
      </div>
      <div className="board-row">
        <Square />
        <Square />
        <Square />
      </div>
      <div className="board-row">
        <Square />
        <Square />
        <Square />
      </div>
    </div>
  );
}
Developer Tools
The React DevTools let you check the props and the state of your React components. You can find the React DevTools tab at the bottom of the browser section in CodeSandbox:

Completing the Game
We now have the basic building blocks for our tic-tac-toe game. To have a complete game, we now need to alternate placing “X”s and “O”s on the board, and we need a way to determine a winner.
Lifting State Up
Currently, each Square component maintains the game’s state. To check for a winner, we’ll maintain the value of each of the 9 squares in one location.
You might guess that Board should just ask each Square for the Square’s state. Although this approach is technically possible in React, we discourage it because the code becomes difficult to understand, susceptible to bugs, and hard to refactor. Instead, the best approach is to store the game’s state in the parent Board component instead of in each Square. The Board component can tell each Square what to display by passing a prop, just like we did when we passed a number to each Square.
To collect data from multiple children, or to have two child components communicate with each other, you need to declare the shared state in their parent component instead. The parent component can pass the state back down to the children by using props; this keeps the child components in sync with each other and with the parent component.
Lifting state into a parent component is common when React components are refactored — let’s take this opportunity to try it out.
Edit the Board component so that it declares a state variable named squares that defaults to an array of 9 nulls corresponding to the 9 squares:
// ...
export default function Board() {
  const [squares, setSquares] = useState(Array(9).fill(null));

  return (
    // ...
  )
}
useState(Array(9).fill(null)) creates an arry with nine elements and sets each of those elements to null. Each entry in the array corrsponds to the value of a square. When we fill the board in later, the squares array will look something like this:
['O', null, 'X', 'X', 'X', 'O', 'O', null, null];Now we need to add the value prop to the Square components we create in the Board component:
export default function Board() {
  const [squares, setSquares] = useState(Array(9).fill(null));
  return (
    <div>
      <div className="board-row">
        <Square values={squares[0]} />
        <Square values={squares[1]} />
        <Square values={squares[2]} />
      </div>
      <div className="board-row">
        <Square values={squares[3]} />
        <Square values={squares[4]} />
        <Square values={squares[5]} />
      </div>
      <div className="board-row">
        <Square values={squares[6]} />
        <Square values={squares[7]} />
        <Square values={squares[8]} />
      </div>
    </div>
  );
}
Next, we’ll wire the Square component to recive the value prop from the Board componenet. This will require removing the Square component’s own stateful tracking of value and the button’s onClick prop:
function Square({value}) {
  return <button className="square">{value}</button>;
}
at this point you should see a empty tic-tac-toe board:

and you code should look like this:
import {useState} from 'react';

function Square({value}) {
  return <button className="square">{value}</button>;
}

export default function Board() {
  const [squares, setSquares] = useState(Array(9).fill(null));
  return (
    <div>
      <div className="board-row">
        <Square value={squares[0]} />
        <Square value={squares[1]} />
        <Square value={squares[2]} />
      </div>
      <div className="board-row">
        <Square value={squares[3]} />
        <Square value={squares[4]} />
        <Square value={squares[5]} />
      </div>
      <div className="board-row">
        <Square value={squares[6]} />
        <Square value={squares[7]} />
        <Square value={squares[8]} />
      </div>
    </div>
  );
}
Each Square will now receive a value prop that will either be 'X', 'O', or null for empty squares.
Next, we need to change what happens when a Square is clicked. The Board component now maintains which squares are filled. We need to create a way for the Square to update the Board’s state. Since state is private to a component that defines it, we cannot update the Board’s state directly from Square.
Instead, we’ll pass down a function from the Board component to the Square component, and we’ll have Square call that function when a square is clicked. We’ll start with the function that the Square component will call when it is clicked. We’ll call that function handleSquareClick:
function Square({value}) {
  return (
    <button className="square" onClick={() => handleSquareClick()}>
      {value}
    </button>
  );
}
Next, we’ll add the handleSquareClick function to the Square componenet’s props:
function Square({value, handleSquareClick}) {
  return (
    <button className="square" onClick={() => handleSquareClick()}>
      {value}
    </button>
  );
}
Now we need to wire up the handleSquareClick method in the Square component to a new function in the Board component that will update the squares array for us. For each Square component that the Board component creates we will add a handleSquareClick prop. This handleSquareClick prop will be a function that will call a handleClick function. The handleClick function will takes an argument that corrsponds to the index of the sqaures array that contains the square’s value:
export default function Board() {
  const [squares, setSquares] = useState(Array(9).fill(null));

  return (
    <div>
      <div className="board-row">
        <Square value={squares[0]} handleSquareClick={() => handleClick(0)} />
        <Square value={squares[1]} handleSquareClick={() => handleClick(1)} />
        <Square value={squares[2]} handleSquareClick={() => handleClick(2)} />
      </div>
      <div className="board-row">
        <Square value={squares[3]} handleSquareClick={() => handleClick(3)} />
        <Square value={squares[4]} handleSquareClick={() => handleClick(4)} />
        <Square value={squares[5]} handleSquareClick={() => handleClick(5)} />
      </div>
      <div className="board-row">
        <Square value={squares[6]} handleSquareClick={() => handleClick(6)} />
        <Square value={squares[7]} handleSquareClick={() => handleClick(7)} />
        <Square value={squares[8]} handleSquareClick={() => handleClick(8)} />
      </div>
    </div>
  );
}
Lastly we will define the handleClick function inside the Board component to update the sqaures array holding our board’s state:
export default function Board() {
  const [squares, setSquares] = useState(Array(9).fill(null));

  function handleClick(i: number) {
    let newSquares = squares.slice();
    newSquares[i] = "X";
    setSquares(newSquares);
  }

  return (
    // ...
  )
}
the handleClick function creates a copy of the squares array (newSquares) with squares.slice(). Then handleClick updates the newSquares array to add a X on the square that was click indicated by the the index of the square’s value (i). Then handleClick updates the squares array to be the newSquares array with the setSquares function.
Now you can add X’s to the board by clicking on them again:
But this time all the state managment is being handled by the Board component! This is what your code should look like:
import {useState} from 'react';

function Square({value, handleSquareClick}) {
  return (
    <button className="square" onClick={() => handleSquareClick()}>
      {value}
    </button>
  );
}

export default function Board() {
  const [squares, setSquares] = useState(Array(9).fill(null));

  function handleClick(i: number) {
    let newSquares = squares.slice();
    newSquares[i] = 'X';
    setSquares(newSquares);
  }

  return (
    <div>
      <div className="board-row">
        <Square value={squares[0]} handleSquareClick={() => handleClick(0)} />
        <Square value={squares[1]} handleSquareClick={() => handleClick(1)} />
        <Square value={squares[2]} handleSquareClick={() => handleClick(2)} />
      </div>
      <div className="board-row">
        <Square value={squares[3]} handleSquareClick={() => handleClick(3)} />
        <Square value={squares[4]} handleSquareClick={() => handleClick(4)} />
        <Square value={squares[5]} handleSquareClick={() => handleClick(5)} />
      </div>
      <div className="board-row">
        <Square value={squares[6]} handleSquareClick={() => handleClick(6)} />
        <Square value={squares[7]} handleSquareClick={() => handleClick(7)} />
        <Square value={squares[8]} handleSquareClick={() => handleClick(8)} />
      </div>
    </div>
  );
}
Now that our state handling is in the board component, the board componenet passes props to the child square componenets so that they can be displayed correctly. When clicking on a square, the square component now has to communicate with the board component to update the status of the board. When the Board’s state changes, the Square components re-render automatically. Keeping the state of all squares in the Board component will allow it to determine the winner in the future.

Now let’s take a look at what happens when a user clicks the top left square on our board to add an X to it:

- The user clicks the top left square
- React calls the
onClickprop method on the square component with index0 - The
onClickprop method calls thehandleSquareClickfunction referenced in the square component with index1 - The
handleSquareClickmethod calls thehandleClick(0)method in theBoardcomponent. ThehandleClickmethod is called with index of the clicked square component (0) as an argument - The
handleClickuses the argument (0) to update the first element of thesquaresarray fromnulltoX - All the square components are re-rendered because the board component
squaresprop was updated. Thevalueprop of the square component with index0changes fromnulltoX - The user sees that the upper left square has changed from empty to having a
X.
Why Immutability Is Important
Note how in handleClick, we call .slice() to create a copy of the squares array instead of modifying the existing array. To explain why, we’ll now discuss immutability and why immutability is important to learn.
There are generally two approaches to changing data. The first approach is to mutate the data by directly changing the data’s values. The second approach is to replace the data with a new copy which has the desired changes.
Data Change with Mutation
let squares = [null, null, null, null, null, null, null, null, null];
squares[0] = 'X';
// Now `squares` is ["X", null, null, null, null, null, null, null, null];
Data Change without Mutation
let squares = [null, null, null, null, null, null, null, null, null];
let newSquares = ['X', null, null, null, null, null, null, null, null];
// Now `squares` is unchanged, but `newSquares` first element has been updated
// from `null` to `X`
The end result is the same but by not mutating (or changing the underlying data) directly, we gain several benefits described below.
Complex Features Become Simple
Immutability makes complex features much easier to implement. Later in this tutorial, we will implement a “time travel” feature that allows us to review the tic-tac-toe game’s history and “jump back” to previous moves. This functionality isn’t specific to games — an ability to undo and redo certain actions is a common requirement in applications. Avoiding direct data mutation lets us keep previous versions of the game’s history intact, and reuse them later.
Detecting Changes
Detecting changes in mutable objects is difficult because they are modified directly. This detection requires the mutable object to be compared to previous copies of itself and the entire object tree to be traversed.
Detecting changes in immutable objects is significantly easier. If the immutable object that is being referenced is different than the previous one, then the object has changed.
Determining When to Re-Render in React
The main benefit of immutability is that it helps you build pure components in React. Immutable data can let you easily determine if changes have been made, which helps to determine when a component requires re-rendering.
You can learn more about shouldComponentUpdate() and how you can build pure components by reading Optimizing Performance.
Taking Turns
It’s now time to fix a major defect in our tic-tac-toe game: the “O”s cannot be marked on the board.
We’ll set the first move to be “X” by default. Let’s keep track of this by adding a second piece of state to the Board component:
function Board() {
  const [xIsNext, setXIsNext] = useState(true);
  const [squares, setSquares] = useState(Array(9).fill(null));

  // ...
}
Each time a player moves, xIsNext (a boolean) will be flipped to determine which player goes next and the game’s state will be saved. We’ll update the Board’s handleClick function to flip the value of xIsNext:
export default function Board() {
  const [xIsNext, setXIsNext] = useState(true);
  const [squares, setSquares] = useState(Array(9).fill(null));

  function handleClick(i: number) {
    let newSquares = squares.slice();
    if (xIsNext) {
      newSquares[i] = "X";
    } else {
      newSquares[i] = "O";
    }
    setSquares(newSquares);
    setXIsNext(!xIsNext);
  }

  return (
    //...
  )
}
Now when we click on a square it will alternatve between X’s and O‘s. But we have a problem. Clicking on a square can have two outcomes: either marking the square with a X or a O). Now if we click a square already marked with an X when a O is going to be marked next:

the X is overwritten by an O! While this would add a very interesting twist to the game, to play by the original rules we’ll have to fix this.
The problem is when we mark a square with a X or a O we aren’t first checking to see if its already has a X or O value. We can fix this by returning early. We’ll check to see if the square already has a X or and O and if it does we will return early in the handleClick function to make sure the board isn’t updated and that the game doesn’t progress:
function handleClick(i: number) {
  if (squares[i]) {
    return;
  }
  let newSquares = squares.slice();
  //...
}
Now we can only add X’s or O’s to empty squares! Here is what your code should look like at this point:
import {useState} from 'react';

function Square({value, handleSquareClick}) {
  return (
    <button className="square" onClick={() => handleSquareClick()}>
      {value}
    </button>
  );
}

export default function Board() {
  const [xIsNext, setXIsNext] = useState(true);
  const [squares, setSquares] = useState(Array(9).fill(null));

  function handleClick(i: number) {
    if (squares[i]) {
      return;
    }
    let newSquares = squares.slice();
    if (xIsNext) {
      newSquares[i] = 'X';
    } else {
      newSquares[i] = 'O';
    }
    setSquares(newSquares);
    setXIsNext(!xIsNext);
  }

  return (
    <div>
      <div className="board-row">
        <Square value={squares[0]} handleSquareClick={() => handleClick(0)} />
        <Square value={squares[1]} handleSquareClick={() => handleClick(1)} />
        <Square value={squares[2]} handleSquareClick={() => handleClick(2)} />
      </div>
      <div className="board-row">
        <Square value={squares[3]} handleSquareClick={() => handleClick(3)} />
        <Square value={squares[4]} handleSquareClick={() => handleClick(4)} />
        <Square value={squares[5]} handleSquareClick={() => handleClick(5)} />
      </div>
      <div className="board-row">
        <Square value={squares[6]} handleSquareClick={() => handleClick(6)} />
        <Square value={squares[7]} handleSquareClick={() => handleClick(7)} />
        <Square value={squares[8]} handleSquareClick={() => handleClick(8)} />
      </div>
    </div>
  );
}
Declaring a Winner
Now that we show which player’s turn is next, we should also show when the game is won and there are no more turns to make. To do this we’ll add a helper function called calculateWinner that takes an array of 9 squares, checks for a winner and returns 'X', 'O', or null as appropriate. Don’t worry too much about the calculateWinner function; it’s not specific to React:
function calculateWinner(squares: string[]) {
  const lines = [
    [0, 1, 2],
    [3, 4, 5],
    [6, 7, 8],
    [0, 3, 6],
    [1, 4, 7],
    [2, 5, 8],
    [0, 4, 8],
    [2, 4, 6]
  ];
  for (let i = 0; i < lines.length; i++) {
    const [a, b, c] = lines[i];
    if (squares[a] && squares[a] === squares[b] && squares[a] === squares[c]) {
      return squares[a];
    }
  }
  return null;
}

export default function Board() {
  //...
}
We will call calculateWinner(squares) in the Board component’s handleClick function to check if a player has won. We can perform this check at the same time we check if a user has clicked a square that already has a X or and O. We’d like to return early in both cases:
function handleClick(i) {
  if (calculateWinner(squares) || squares[i]) {
    return;
  }
  const newSquares = squares.slice();
  //...
}
To let the players know when the game is over, we can display text such as “Winner: X” or “Winner: O”. To do that we’ll add a status section to the Board component. The status will display the winner if the game is over and if the game is ongoing we’ll display which player’s turn is next:
export default function Board() {
  //...
  const winner = calculateWinner(squares);
  let status;
  if (winner) {
    status = "Winner: " + winner;
  } else {
    status = "Next player: " + (xIsNext ? "X" : "O");
  }

  return (
    <div>
      <div className="status">{status}</div>
      <div className="board-row">
        //...
  )
}
Lastly we’ll add some CSS to add some spacing between the game status and the board:
.status {
  margin-bottom: 10px;
}
Congratulations! You now have a working tic-tac-toe game. And you’ve just learned the basics of React too. So you’re probably the real winner here. Here is what the code should look like:
import {useState} from 'react';

function Square({value, handleSquareClick}) {
  return (
    <button className="square" onClick={() => handleSquareClick()}>
      {value}
    </button>
  );
}

function calculateWinner(squares: string[]) {
  const lines = [
    [0, 1, 2],
    [3, 4, 5],
    [6, 7, 8],
    [0, 3, 6],
    [1, 4, 7],
    [2, 5, 8],
    [0, 4, 8],
    [2, 4, 6],
  ];
  for (let i = 0; i < lines.length; i++) {
    const [a, b, c] = lines[i];
    if (squares[a] && squares[a] === squares[b] && squares[a] === squares[c]) {
      return squares[a];
    }
  }
  return null;
}

export default function Board() {
  const [xIsNext, setXIsNext] = useState(true);
  const [squares, setSquares] = useState(Array(9).fill(null));

  function handleClick(i: number) {
    if (calculateWinner(squares) || squares[i]) {
      return;
    }
    let newSquares = squares.slice();
    if (xIsNext) {
      newSquares[i] = 'X';
    } else {
      newSquares[i] = 'O';
    }
    setSquares(newSquares);
    setXIsNext(!xIsNext);
  }

  const winner = calculateWinner(squares);
  let status;
  if (winner) {
    status = 'Winner: ' + winner;
  } else {
    status = 'Next player: ' + (xIsNext ? 'X' : 'O');
  }

  return (
    <div>
      <div className="status">{status}</div>
      <div className="board-row">
        <Square value={squares[0]} handleSquareClick={() => handleClick(0)} />
        <Square value={squares[1]} handleSquareClick={() => handleClick(1)} />
        <Square value={squares[2]} handleSquareClick={() => handleClick(2)} />
      </div>
      <div className="board-row">
        <Square value={squares[3]} handleSquareClick={() => handleClick(3)} />
        <Square value={squares[4]} handleSquareClick={() => handleClick(4)} />
        <Square value={squares[5]} handleSquareClick={() => handleClick(5)} />
      </div>
      <div className="board-row">
        <Square value={squares[6]} handleSquareClick={() => handleClick(6)} />
        <Square value={squares[7]} handleSquareClick={() => handleClick(7)} />
        <Square value={squares[8]} handleSquareClick={() => handleClick(8)} />
      </div>
    </div>
  );
}
Adding Time Travel
As a final exercise, let’s make it possible to “go back in time” to the previous moves in the game.
Storing a History of Moves
If we mutated the squares array, implementing time travel would be very difficult.
However, we used slice() to create a new copy of the squares array after every move, and treated it as immutable. This will allow us to store every past version of the squares array, and navigate between the turns that have already happened.
We’ll store the past squares arrays in another array called history, which we’ll store as a new state variable. The history array represents all board states, from the first to the last move, and has a shape like this:
history = [
  // Before first move
  [null, null, null, null, null, null, null, null, null],
  // After first move
  [null, null, null, null, 'X', null, null, null, null],
  // After second move
  [null, null, null, null, 'X', null, null, null, 'O'],
  // ...
];
Lifting State Up, Again
Let’s make a new top-level component called Game to display a list of past moves. To make this possible, we’ll place the history state in the top-level Game component.
Placing the history state into the Game component lets us remove the squares state from its child Board component. Just like we “lifted state up” from the Square component into the Board component, we are now lifting it up from the Board into the top-level Game component. This gives the Game component full control over the Board’s data, and lets it instruct the Board to render previous turns from the history.
First, let’s make the Game component, make it the default export for our module, and have it return the Board component:
function Board() {
  //...
}

export default function Game() {
  return (
    <div className="game">
      <div className="game-board">
        <Board />
      </div>
      <div className="game-info">
        <ol>{/*TODO*/}</ol>
      </div>
    </div>
  );
}
Note that we are removing the default export statement before the function Board() { and adding it before our function Game() { defition. This tells our index.js file to use the Game component as the top level component instead of our Board component. The additional divs returned by the Game component are making room for the game information we’ll add next to the board later.
Next, we’ll add state varilbes to track which player is next, and the history of moves in the game. While we’re at it we’ll add a varible to cacluate the current squares based on the most recent entry in the history state varible. Next, we’ll create a handlePlay function inside the Game component that will be called by the Board component to update the game. Lastly, we’ll pass the xIsNext, currentSquares and handlePlay as props to the Board component:
export default function Game() {
  const [xIsNext, setXIsNext] = useState(true);
  const [history, setHistory] = useState([Array(9).fill(null)]);
  const currentSquares = history[history.length - 1];

  function handlePlay(newSquares) {
    // TODO
  }
  return (
    <div className="game">
      <div className="game-board">
        <Board xIsNext={xIsNext} squares={currentSquares} onPlay={handlePlay} />
        //...
  )
}
Let’s make the Board component stateless, by making it fully controlled by the props it receives. Change the Board component to take three props: xIsNext, squares, and a new onPlay function that Board can call with the updated squares array whenever a player makes a move. Next, remove the first two lines of the Board function that call useState:
function Board({ xIsNext, squares, onPlay }) {
  function handleClick(i: number) {
    //...
  }
}
Now we’ll replace the setSquares and setXIsNext calls in handleClick in the Board component with a single call to our new onPlay function so the Game component can update the Board when a user clicks a square:
function Board({ xIsNext, squares, onPlay }) {
  function handleClick(i: number) {
    if (calculateWinner(squares) || squares[i]) {
      return;
    }
    let newSquares = squares.slice();
    if (xIsNext) {
      newSquares[i] = "X";
    } else {
      newSquares[i] = "O";
    }
    onPlay(newSquares);
  }
  //...
}
The Board component is fully controlled by the props passed to it by the Game component. We need to implement the handlePlay function in the Game component to get the game working again.
What should handlePlay do when called? Remember that Board used to call setSquares with an updated array; now it passes the updated squares array to onPlay.
The handlePlay function needs to update Game’s state to trigger a re-render, but we don’t have a setSquares function that we can call any more – we’re now using the history state variable to store this information. We want to update history by appending the updated squares array as a new history entry. We also want to toggle xIsNext, just as Board used to do:
function handlePlay(newSquares) {
  setHistory(history.concat([newSquares]));
  setXIsNext(!xIsNext);
}At this point, we’ve moved the state to live in the Game component, but the UI should be fully working, just as it was before the refactor.
Here is what the code should look like at this point:
import {useState} from 'react';

function Square({value, handleSquareClick}) {
  return (
    <button className="square" onClick={() => handleSquareClick()}>
      {value}
    </button>
  );
}

function calculateWinner(squares: string[]) {
  const lines = [
    [0, 1, 2],
    [3, 4, 5],
    [6, 7, 8],
    [0, 3, 6],
    [1, 4, 7],
    [2, 5, 8],
    [0, 4, 8],
    [2, 4, 6],
  ];
  for (let i = 0; i < lines.length; i++) {
    const [a, b, c] = lines[i];
    if (squares[a] && squares[a] === squares[b] && squares[a] === squares[c]) {
      return squares[a];
    }
  }
  return null;
}

function Board({xIsNext, squares, onPlay}) {
  function handleClick(i: number) {
    if (calculateWinner(squares) || squares[i]) {
      return;
    }
    let newSquares = squares.slice();
    if (xIsNext) {
      newSquares[i] = 'X';
    } else {
      newSquares[i] = 'O';
    }
    onPlay(newSquares);
  }

  const winner = calculateWinner(squares);
  let status;
  if (winner) {
    status = 'Winner: ' + winner;
  } else {
    status = 'Next player: ' + (xIsNext ? 'X' : 'O');
  }

  return (
    <div>
      <div className="status">{status}</div>
      <div className="board-row">
        <Square value={squares[0]} handleSquareClick={() => handleClick(0)} />
        <Square value={squares[1]} handleSquareClick={() => handleClick(1)} />
        <Square value={squares[2]} handleSquareClick={() => handleClick(2)} />
      </div>
      <div className="board-row">
        <Square value={squares[3]} handleSquareClick={() => handleClick(3)} />
        <Square value={squares[4]} handleSquareClick={() => handleClick(4)} />
        <Square value={squares[5]} handleSquareClick={() => handleClick(5)} />
      </div>
      <div className="board-row">
        <Square value={squares[6]} handleSquareClick={() => handleClick(6)} />
        <Square value={squares[7]} handleSquareClick={() => handleClick(7)} />
        <Square value={squares[8]} handleSquareClick={() => handleClick(8)} />
      </div>
    </div>
  );
}

export default function Game() {
  const [xIsNext, setXIsNext] = useState(true);
  const [history, setHistory] = useState([Array(9).fill(null)]);
  const currentSquares = history[history.length - 1];

  function handlePlay(newSquares: string[]) {
    setHistory(history.concat([newSquares]));
    setXIsNext(!xIsNext);
  }

  return (
    <div className="game">
      <div className="game-board">
        <Board xIsNext={xIsNext} squares={currentSquares} onPlay={handlePlay} />
      </div>
      <div className="game-info">
        <ol>{/*TODO*/}</ol>
      </div>
    </div>
  );
}
Showing the Past Moves
Since we are recording the tic-tac-toe game’s history, we can now display it to the player as a list of past moves.
We learned earlier that React elements are first-class JavaScript objects; we can pass them around in our applications. To render multiple items in React, we can use an array of React elements.
You may be used to the map() method that is commonly used for transforming an array of data:
[1, 2, 3].map((x) => x * 2); // [2, 4, 6]Here, we’ll use the map method to transform our history of moves into React elements representing buttons on the screen, and we’ll display a list of buttons to “jump” to past moves.
Let’s map over the history in the Game component:
export default function Game() {
  const [xIsNext, setXIsNext] = useState(true);
  const [history, setHistory] = useState([Array(9).fill(null)]);
  const currentSquares = history[history.length - 1];

  function handlePlay(newSquares) {
    setHistory(history.concat([newSquares]));
    setXIsNext(!xIsNext);
  }

  function jumpTo(step: number) {
    // TODO
  }

  const moves = history.map((step, move) => {
    let description;
    if (move > 0) {
      description = `Go to move #${move}`;
    } else {
      description = 'Go to game start';
    }
    return (
      <li>
        <button onClick={() => jumpTo(move)}>{description}</button>
      </li>
    );
  });

  return (
    <div className="game">
      <div className="game-board">
        <Board xIsNext={xIsNext} squares={currentSquares} onPlay={handlePlay} />
      </div>
      <div className="game-info">
        <ol>{moves}</ol>
      </div>
    </div>
  );
}
We’ll also add some CSS to bring the move history next to the board:
.game {
  display: flex;
  flex-direction: row;
}

.game-info {
  margin-left: 20px;
}
Here is what the code should look like:
import {useState} from 'react';

function Square({value, handleSquareClick}) {
  return (
    <button className="square" onClick={() => handleSquareClick()}>
      {value}
    </button>
  );
}

function calculateWinner(squares: string[]) {
  const lines = [
    [0, 1, 2],
    [3, 4, 5],
    [6, 7, 8],
    [0, 3, 6],
    [1, 4, 7],
    [2, 5, 8],
    [0, 4, 8],
    [2, 4, 6],
  ];
  for (let i = 0; i < lines.length; i++) {
    const [a, b, c] = lines[i];
    if (squares[a] && squares[a] === squares[b] && squares[a] === squares[c]) {
      return squares[a];
    }
  }
  return null;
}

function Board({xIsNext, squares, onPlay}) {
  function handleClick(i: number) {
    if (calculateWinner(squares) || squares[i]) {
      return;
    }
    let newSquares = squares.slice();
    if (xIsNext) {
      newSquares[i] = 'X';
    } else {
      newSquares[i] = 'O';
    }
    onPlay(newSquares);
  }

  const winner = calculateWinner(squares);
  let status;
  if (winner) {
    status = 'Winner: ' + winner;
  } else {
    status = 'Next player: ' + (xIsNext ? 'X' : 'O');
  }

  return (
    <div>
      <div className="status">{status}</div>
      <div className="board-row">
        <Square value={squares[0]} handleSquareClick={() => handleClick(0)} />
        <Square value={squares[1]} handleSquareClick={() => handleClick(1)} />
        <Square value={squares[2]} handleSquareClick={() => handleClick(2)} />
      </div>
      <div className="board-row">
        <Square value={squares[3]} handleSquareClick={() => handleClick(3)} />
        <Square value={squares[4]} handleSquareClick={() => handleClick(4)} />
        <Square value={squares[5]} handleSquareClick={() => handleClick(5)} />
      </div>
      <div className="board-row">
        <Square value={squares[6]} handleSquareClick={() => handleClick(6)} />
        <Square value={squares[7]} handleSquareClick={() => handleClick(7)} />
        <Square value={squares[8]} handleSquareClick={() => handleClick(8)} />
      </div>
    </div>
  );
}

export default function Game() {
  const [xIsNext, setXIsNext] = useState(true);
  const [history, setHistory] = useState([Array(9).fill(null)]);
  const currentSquares = history[history.length - 1];

  function handlePlay(newSquares: string[]) {
    setHistory(history.concat([newSquares]));
    setXIsNext(!xIsNext);
  }

  function jumpTo(step: number) {
    // TODO
  }

  const moves = history.map((step, move) => {
    let description;
    if (move > 0) {
      description = `Go to move #${move}`;
    } else {
      description = 'Go to game start';
    }
    return (
      <li>
        <button onClick={() => jumpTo(move)}>{description}</button>
      </li>
    );
  });

  return (
    <div className="game">
      <div className="game-board">
        <Board xIsNext={xIsNext} squares={currentSquares} onPlay={handlePlay} />
      </div>
      <div className="game-info">
        <ol>{moves}</ol>
      </div>
    </div>
  );
}
As we iterate through history array, the step variable goes through each element of history, and index goes through each array index: 0, 1, 2, …. (In most cases, you’d need the actual array elements, but in this case we don’t use step.)
For each move in the tic-tac-toe game’s history, we create a list item <li> which contains a button <button>. The button has a onClick handler which calls a function called this.jumpTo() (that we haven’t defined yet).
For now, we should see a list of the moves that have occurred in the game and a warning in the developer tools console that says: Warning: Each child in an array or iterator should have a unique "key" prop. Check the render method of "Game".
Let’s discuss what this warning means.
Picking a Key
When we render a list, React stores some information about each rendered list item. When we update a list, React needs to determine what has changed. We could have added, removed, re-arranged, or updated the list’s items.
Imagine transitioning from
<li>Alexa: 7 tasks left</li>
<li>Ben: 5 tasks left</li>
to
<li>Ben: 9 tasks left</li>
<li>Claudia: 8 tasks left</li>
<li>Alexa: 5 tasks left</li>
In addition to the updated counts, a human reading this would probably say that we swapped Alexa and Ben’s ordering and inserted Claudia between Alexa and Ben. However, React is a computer program and can’t know what we intended, so we need to specify a key property for each list item to differentiate each list item from its siblings. If we were displaying data from a database, Alexa, Ben, and Claudia’s database IDs could be used as keys.
<li key={user.id}>
  {user.name}: {user.taskCount} tasks left
</li>
When a list is re-rendered, React takes each list item’s key and searches the previous list’s items for a matching key. If the current list has a key that didn’t exist before, React creates a component. If the current list is missing a key that existed in the previous list, React destroys the previous component. If two keys match, the corresponding component is moved.
Keys tell React about the identity of each component, which allows React to maintain state between re-renders. If a component’s key changes, the component will be destroyed and re-created with a new state.
key is a special and reserved property in React (along with ref, a more advanced feature). When an element is created, React extracts the key property and stores the key directly on the returned element. Even though key may look like it is passed as props, React automatically uses key to decide which components to update. There’s no way for a component to ask what key its parent specified.
It’s strongly recommended that you assign proper keys whenever you build dynamic lists. If you don’t have an appropriate key, you may want to consider restructuring your data so that you do.
If no key is specified, React will present a warning and use the array index as a key by default. Using the array index as a key is problematic when trying to re-order a list’s items or inserting/removing list items. Explicitly passing key={i} silences the warning but has the same problems as array indices and is not recommended in most cases.
Keys do not need to be globally unique; they only need to be unique between components and their siblings.
Implementing Time Travel
In the tic-tac-toe game’s history, each past move has a unique ID associated with it: it’s the sequential number of the move. Moves will never be re-ordered, deleted, or inserted in the middle, so it’s safe to use the move index as a key.
In the Game function, we can add the key as <li key={move}>, and if you reload the rendered game, React’s warning about keys should disappear:
const moves = history.map((step, move) => {
  //...
  return (
    <li key={move}>
      <button onClick={() => jumpTo(move)}>{description}</button>
    </li>
  );
});import {useState} from 'react'; function Square({value, handleSquareClick}) { return ( <button className="square" onClick={() => handleSquareClick()}> {value} </button> ); } function calculateWinner(squares: string[]) { const lines = [ [0, 1, 2], [3, 4, 5], [6, 7, 8], [0, 3, 6], [1, 4, 7], [2, 5, 8], [0, 4, 8], [2, 4, 6], ]; for (let i = 0; i < lines.length; i++) { const [a, b, c] = lines[i]; if (squares[a] && squares[a] === squares[b] && squares[a] === squares[c]) { return squares[a]; } } return null; } function Board({xIsNext, squares, onPlay}) { function handleClick(i: number) { if (calculateWinner(squares) || squares[i]) { return; } let newSquares = squares.slice(); if (xIsNext) { newSquares[i] = 'X'; } else { newSquares[i] = 'O'; } onPlay(newSquares); } const winner = calculateWinner(squares); let status; if (winner) { status = 'Winner: ' + winner; } else { status = 'Next player: ' + (xIsNext ? 'X' : 'O'); } return ( <div> <div className="status">{status}</div> <div className="board-row"> <Square value={squares[0]} handleSquareClick={() => handleClick(0)} /> <Square value={squares[1]} handleSquareClick={() => handleClick(1)} /> <Square value={squares[2]} handleSquareClick={() => handleClick(2)} /> </div> <div className="board-row"> <Square value={squares[3]} handleSquareClick={() => handleClick(3)} /> <Square value={squares[4]} handleSquareClick={() => handleClick(4)} /> <Square value={squares[5]} handleSquareClick={() => handleClick(5)} /> </div> <div className="board-row"> <Square value={squares[6]} handleSquareClick={() => handleClick(6)} /> <Square value={squares[7]} handleSquareClick={() => handleClick(7)} /> <Square value={squares[8]} handleSquareClick={() => handleClick(8)} /> </div> </div> ); } export default function Game() { const [xIsNext, setXIsNext] = useState(true); const [history, setHistory] = useState([Array(9).fill(null)]); const currentSquares = history[history.length - 1]; function handlePlay(newSquares: string[]) { setHistory(history.concat([newSquares])); setXIsNext(!xIsNext); } function jumpTo(step: number) { // TODO } const moves = history.map((step, move) => { let description; if (move > 0) { description = `Go to move #${move}`; } else { description = 'Go to game start'; } return ( <li key={move}> <button onClick={() => jumpTo(move)}>{description}</button> </li> ); }); return ( <div className="game"> <div className="game-board"> <Board xIsNext={xIsNext} squares={currentSquares} onPlay={handlePlay} /> </div> <div className="game-info"> <ol>{moves}</ol> </div> </div> ); }
Before we implement jumpTo, we’ll add stepNumber to the Game component’s state to indicate which step we’re currently viewing.
First, define it as a new state variable, defaulting to 0:
export default function Game() {
  const [xIsNext, setXIsNext] = useState(true);
  const [history, setHistory] = useState([Array(9).fill(null)]);
  const [stepNumber, setStepNumber] = useState(0);
  const currentSquares = history[history.length - 1];
  //...
}
Next, update the jumpTo function inside Game to update that stepNumber. We’ll also set xIsNext to true if the number that we’re changing stepNumber to is even:
export default function Game() {
  // ...

  function jumpTo(step: number) {
    setStepNumber(step);
    setXIsNext(step % 2 === 0);
  }

  //...
}
We will now make two changes to the Game’s handlePlay method which fires when you click on a square.
- If we “go back in time” and then make a new move from that point, we only want to keep the history up to that point, so we’ll call
history.slice(0, stepNumber + 1)before.concat()to make sure we’re only keeping that portion of the old history. - Each time a move is made, we need to update
stepNumberto point to the latest history entry.
function handlePlay(newSquares: string[]) {
  let newHistory = history.slice(0, stepNumber + 1).concat([newSquares]);
  setHistory(newHistory);
  setStepNumber(newHistory.length - 1);
  setXIsNext(!xIsNext);
}
Finally, we will modify the Game component to render the currently selected move, instead of always rendering the final move:
export default function Game() {
  const [xIsNext, setXIsNext] = useState(true);
  const [history, setHistory] = useState([Array(9).fill(null)]);
  const [stepNumber, setStepNumber] = useState(0);
  const currentSquares = history[stepNumber];

  // ...
}
If we click on any step in the game’s history, the tic-tac-toe board should immediately update to show what the board looked like after that step occurred.
import {useState} from 'react';

function Square({value, handleSquareClick}) {
  return (
    <button className="square" onClick={() => handleSquareClick()}>
      {value}
    </button>
  );
}

function calculateWinner(squares: string[]) {
  const lines = [
    [0, 1, 2],
    [3, 4, 5],
    [6, 7, 8],
    [0, 3, 6],
    [1, 4, 7],
    [2, 5, 8],
    [0, 4, 8],
    [2, 4, 6],
  ];
  for (let i = 0; i < lines.length; i++) {
    const [a, b, c] = lines[i];
    if (squares[a] && squares[a] === squares[b] && squares[a] === squares[c]) {
      return squares[a];
    }
  }
  return null;
}

function Board({xIsNext, squares, onPlay}) {
  function handleClick(i: number) {
    if (calculateWinner(squares) || squares[i]) {
      return;
    }
    let newSquares = squares.slice();
    if (xIsNext) {
      newSquares[i] = 'X';
    } else {
      newSquares[i] = 'O';
    }
    onPlay(newSquares);
  }

  const winner = calculateWinner(squares);
  let status;
  if (winner) {
    status = 'Winner: ' + winner;
  } else {
    status = 'Next player: ' + (xIsNext ? 'X' : 'O');
  }

  return (
    <div>
      <div className="status">{status}</div>
      <div className="board-row">
        <Square value={squares[0]} handleSquareClick={() => handleClick(0)} />
        <Square value={squares[1]} handleSquareClick={() => handleClick(1)} />
        <Square value={squares[2]} handleSquareClick={() => handleClick(2)} />
      </div>
      <div className="board-row">
        <Square value={squares[3]} handleSquareClick={() => handleClick(3)} />
        <Square value={squares[4]} handleSquareClick={() => handleClick(4)} />
        <Square value={squares[5]} handleSquareClick={() => handleClick(5)} />
      </div>
      <div className="board-row">
        <Square value={squares[6]} handleSquareClick={() => handleClick(6)} />
        <Square value={squares[7]} handleSquareClick={() => handleClick(7)} />
        <Square value={squares[8]} handleSquareClick={() => handleClick(8)} />
      </div>
    </div>
  );
}

export default function Game() {
  const [xIsNext, setXIsNext] = useState(true);
  const [history, setHistory] = useState([Array(9).fill(null)]);
  const [stepNumber, setStepNumber] = useState(0);
  const currentSquares = history[stepNumber];

  function handlePlay(newSquares: string[]) {
    let newHistory = history.slice(0, stepNumber + 1).concat([newSquares]);
    setHistory(newHistory);
    setStepNumber(newHistory.length - 1);
    setXIsNext(!xIsNext);
  }

  function jumpTo(step: number) {
    setStepNumber(step);
    setXIsNext(step % 2 === 0);
  }

  const moves = history.map((step, move) => {
    let description;
    if (move > 0) {
      description = `Go to move #${move}`;
    } else {
      description = 'Go to game start';
    }
    return (
      <li key={move}>
        <button onClick={() => jumpTo(move)}>{description}</button>
      </li>
    );
  });

  return (
    <div className="game">
      <div className="game-board">
        <Board xIsNext={xIsNext} squares={currentSquares} onPlay={handlePlay} />
      </div>
      <div className="game-info">
        <ol>{moves}</ol>
      </div>
    </div>
  );
}
Final Cleanup
If you’re eagle-eyed, you may notice that xIsNext === true when stepNumber is even and xIsNext === false when stepNumber is odd. In other words, if we know the value of stepNumber, then we can always figure out what xIsNext should be.
There’s no reason for us to store both of these in state. It’s a best practice to avoid redundant pieces of state, because simplifying what you store in state helps reduce bugs and make your code easier to understand. Let’s change Game so that it no longer stores xIsNext as a separate state variable and instead figures it out based on the current value of stepNumber:
export default function Game() {

  const [history, setHistory] = useState([Array(9).fill(null)]);
  const [stepNumber, setStepNumber] = useState(0);
  const xIsNext = stepNumber % 2 === 0;
  const currentSquares = history[stepNumber];

  function handlePlay(newSquares) {
    let newHistory = history.slice(0, stepNumber + 1).concat([newSquares]);
    setHistory(newHistory);
    setStepNumber(newHistory.length - 1);

  }

  function jumpTo(step) {
    setStepNumber(step);

  }

  // ...
}
We no longer need the xIsNext state declaration or the calls to setXIsNext. Now, there’s no chance for xIsNext to get out of sync with stepNumber, even if we make an error while coding the components.
Wrapping Up
Congratulations! You’ve created a tic-tac-toe game that:
- Lets you play tic-tac-toe,
- Indicates when a player has won the game,
- Stores a game’s history as a game progresses,
- Allows players to review a game’s history and see previous versions of a game’s board.
Nice work! We hope you now feel like you have a decent grasp of how React works.
Check out the final result here:
import {useState} from 'react';

function Square({value, handleSquareClick}) {
  return (
    <button className="square" onClick={() => handleSquareClick()}>
      {value}
    </button>
  );
}

function calculateWinner(squares: string[]) {
  const lines = [
    [0, 1, 2],
    [3, 4, 5],
    [6, 7, 8],
    [0, 3, 6],
    [1, 4, 7],
    [2, 5, 8],
    [0, 4, 8],
    [2, 4, 6],
  ];
  for (let i = 0; i < lines.length; i++) {
    const [a, b, c] = lines[i];
    if (squares[a] && squares[a] === squares[b] && squares[a] === squares[c]) {
      return squares[a];
    }
  }
  return null;
}

function Board({xIsNext, squares, onPlay}) {
  function handleClick(i: number) {
    if (calculateWinner(squares) || squares[i]) {
      return;
    }
    let newSquares = squares.slice();
    if (xIsNext) {
      newSquares[i] = 'X';
    } else {
      newSquares[i] = 'O';
    }
    onPlay(newSquares);
  }

  const winner = calculateWinner(squares);
  let status;
  if (winner) {
    status = 'Winner: ' + winner;
  } else {
    status = 'Next player: ' + (xIsNext ? 'X' : 'O');
  }

  return (
    <div>
      <div className="status">{status}</div>
      <div className="board-row">
        <Square value={squares[0]} handleSquareClick={() => handleClick(0)} />
        <Square value={squares[1]} handleSquareClick={() => handleClick(1)} />
        <Square value={squares[2]} handleSquareClick={() => handleClick(2)} />
      </div>
      <div className="board-row">
        <Square value={squares[3]} handleSquareClick={() => handleClick(3)} />
        <Square value={squares[4]} handleSquareClick={() => handleClick(4)} />
        <Square value={squares[5]} handleSquareClick={() => handleClick(5)} />
      </div>
      <div className="board-row">
        <Square value={squares[6]} handleSquareClick={() => handleClick(6)} />
        <Square value={squares[7]} handleSquareClick={() => handleClick(7)} />
        <Square value={squares[8]} handleSquareClick={() => handleClick(8)} />
      </div>
    </div>
  );
}

export default function Game() {
  const [history, setHistory] = useState([Array(9).fill(null)]);
  const [stepNumber, setStepNumber] = useState(0);
  const xIsNext = stepNumber % 2 === 0;
  const currentSquares = history[stepNumber];

  function handlePlay(newSquares: string[]) {
    let newHistory = history.slice(0, stepNumber + 1).concat([newSquares]);
    setHistory(newHistory);
    setStepNumber(newHistory.length - 1);
  }

  function jumpTo(step: number) {
    setStepNumber(step);
  }

  const moves = history.map((step, move) => {
    let description;
    if (move > 0) {
      description = `Go to move #${move}`;
    } else {
      description = 'Go to game start';
    }
    return (
      <li key={move}>
        <button onClick={() => jumpTo(move)}>{description}</button>
      </li>
    );
  });

  return (
    <div className="game">
      <div className="game-board">
        <Board xIsNext={xIsNext} squares={currentSquares} onPlay={handlePlay} />
      </div>
      <div className="game-info">
        <ol>{moves}</ol>
      </div>
    </div>
  );
}
If you have extra time or want to practice your new React skills, here are some ideas for improvements that you could make to the tic-tac-toe game, listed in order of increasing difficulty:
- Rewrite Board to use two loops to make the squares instead of hardcoding them.
- Add a toggle button that lets you sort the moves in either ascending or descending order.
- When someone wins, highlight the three squares that caused the win (and when no one wins, display a message about the result being a draw).
- Display the location for each move in the format (col, row) in the move history list.
Throughout this tutorial, we touched on React concepts including elements, components, props, and state. For a more detailed explanation of each of these topics, check out the rest of the documentation.